GRP Roof Coating & Hole Repair Kit

Price range: £226.59 through £505.98 (inc. VAT)

Repair holes then coat to fully waterproof and restore.

roof repair kit tick Only ONE coat needed
roof repair kit tick No primer required

roof repair kit tick Gives 10 to 15 year life expectancy

SKU: N/A Categories: ,

Description

Repairing holes and restoring and protecting your fibreglass roof couldn’t be easier with our GRP Roof Restoration and Hole Repair Kit.

Just clean, stick on the repair patches over any holes then paint on the coating, it’s that simple.

What You Need to Know:
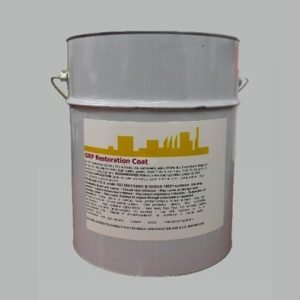
Colour: Pale grey
Size: 6kg or 15kg tin
Coverage: 1m2 per kg of coating and either 1 or 2 x SpeedPatch 150mm x 225mm (depending on the kit size you purchase).
Application: Stick on speedpatch and remove protective film then paint or roller on restoration coating
Touch dry time: 3 to 4 hours

Whats in the kits?

Kits come in 6kg and 15kg sizes.
A 6kg kit contains: 1 x 6kg Tin of GRP Restoration Coat, 1 x SpeedPatch 150mm x 225mm each, 1 x 9″ Roller head and 2 x 9″ Roller Sleeve, 1 x 2″ brush.
A 15kg tin kit contains: 1 x 15kg Tin of GRP Restoration Coat, 2 x SpeedPatch 150mm x 225mm each, 1 x 9″ Roller head and 2 x 9″ Roller Sleeve, 1 x 2″ brush.

If you need extra Speedpatches you can buy them individually or in multi-packs.

Why Choose GRP Restoration Coating?
  • Minimal preparation
  • Just one coat, no primer needed
  • Easy to apply
  • 10 – 15 years life expectancy
  • Tough finish
  • Tolerant of high humidity, unlike GRP resin
  • Tolerant of a range of temperatures during application
  • Easy to re-coat in the future
Need A Different Kit?

If you have any cracks you might want to consider using the GRP Roof Restoration Kit for Cracks.

If you need to reinforce the area, you might want to consider using the GRP Roof Restoration and Reinforcement Kit.


Need to make repairs first? No problem, just have a look at our GRP Repair kits which come with all the tools and additional products you’ll need to make repairs on their own or before coating.
Size:
6kg or 15kg tin
Coverage:
1kg per m2
Colour:
Pale Grey
Touch dry time of top coat:
3 to 4 hours
Application:
Get the surface clean and dry. Stick on the Speedpatch (it starts to cure as soon as you take it out of the packet so use immediately). Once hardened peel off the shiny protective film then paint on Restoration Coat using a brush or roller. If you want a clean edge you can use masking tape on the edges and remove as soon as the coating starts to become tacky.

APPLICATION INSTRUCTIONS

Choose a Good Day + Get Ready

Before you begin:
✔ Pick a dry, mild day (not raining, ideally above ~10 °C).
✔ Lay out your tools — roller, tray, brush, scissors, gloves, a clean rag, and solvent/cleaner for tools.

  1. Prepare the Roof Surface

Sweep away debris such as leaves, moss, dust, dirt and bird droppings.

Check for protruding glass fibres – if you see fibres sticking up, gently sand or trim them off so the surface is smooth.

Clean the surface clean with water and a mild detergent and then rinse thoroughly, so that it’s dust free before you start repairs.

Good surface preparation is critical – skipping this makes good adhesion and a watertight finish much harder.

  1. Mask the Edges (Optional but Helpful)

To get crisp, neat lines where the roof meets walls, trims, etc.:

Apply tape around the edges before you coat, and remove it later once the coating gets tacky.

  1. Cut and Apply the SpeedPatch

Open the clear outer bag and remove the black inner bag, with the patch still inside to ensure that the light does not get to it.

Cut the SpeedPatch to size (do this while still in black bag to prevent curing):

Make sure it covers well beyond the hole for strength and durability

Remove the patch from the black bag.

Peel off the white release paper from the back.

Carefully place the patch over the hole.

Apply firm, even pressure where it is safe to do so

Pay extra attention to the edges

Ensure the patch is fully bonded with no lifting or air pockets

The SpeedPatch usually takes 15-45 minutes to cure depending on uv strength

Remove the clear film if you are going to sand, drill or paint over the patch

  1. Apply Coating

Stir the GRP Roof Restoration Coat so it’s even and well mixed. Do not do this quickly otherwise you may cause air bubbles.

Pour some into a roller tray.

Using a brush or roller, apply a generous layer over the sealed repairs and surrounding roof surface.

Work carefully around edges and details.

The kit coverage is about 1 kg per m².

Make sure the repairs and roof surface are covered smoothly with no visible gaps.

This top coat not only seals the roof but also gives it a durable, weather-resistant finish.

  1. Cleaning Up

Clean rollers, brushes, trays, etc. with xylene or a strong solvent right after use — the coating dries tough and is hard to remove once cured.


Xylene Thinners

Price range: £10.30 through £204.86 (inc. VAT)

You may also like…